Close menu Resources for... William & Mary
W&M menu close William & Mary

Google Map Row

The Google Map row displays an interactive map of a location through a variety of layout styles — two options that present as a large feature, two options with side-by-side content areas and one option that is fully edge-to-edge.

Rows are available to specified users who have received the required training, consultation, and approval from their Cascade Manager.
Suggested Uses
  • Highlight a location to help visitors navigate to an office or event.
  • Highlight a popular campus location.

Note: This row only accepts Google Maps location embed code.

Create a New Row
  • Select your rows storage folder — this is likely labeled _rows or similar. If you don't have one yet, build one now.
  • From the top menu, select Add Content > Rows > Google Map.
Basic Fields & Options

These fields appear in each layout option for this row:

  • Page Name: Required field; this is your row's file name in Cascade; customize the default name of row-google-map.
  • Title: Required field; used as a section header for screen readers and should be meaningful.
  • Show Title?
    • If unchecked: The title is used by screen readers but not visually displayed.
    • If checked: The title is prominently displayed at the top or above the text side of the row. 
    • The Edge-to-Edge layout does not visually display the title, regardless of this setting.
  • Row Theme: Select one of the available colors as the row's default theme. Elements within the row will be color-coordinated and optimized for design and accessibility. When placing the row on a page, the theme can be customized for that page. The Row Theme setting does not impact the appearance of this layout.
  • Embed Layout: Select one of the available layout options - Feature, Wide Feature, 50-50, 50-50 Large or Edge-to-Edge. See layout details and additional fields, below.
  • Embed: Fill in the required Embed Code field. To get the code, follow these steps:
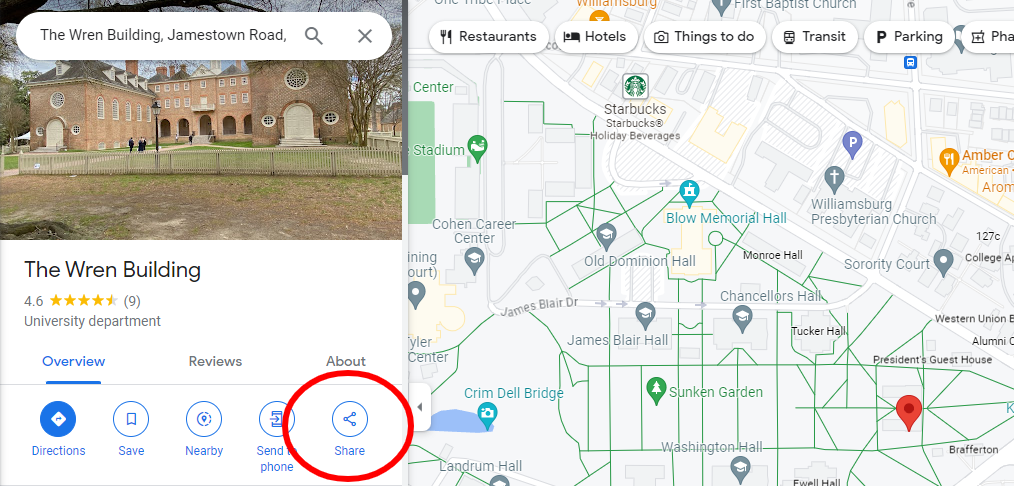
    1. Search for the location on Google Maps.
    2. Select 'Share' on the location's information panel.
      A web browser screenshot shows Google Maps' main page with the 'shared' button circled in red.
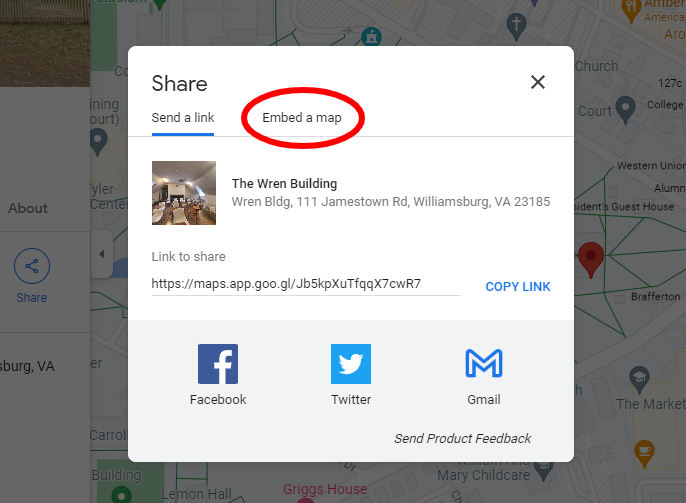
    3. Select the 'Embed a map' tab.
      A web browser screenshot shows the 'Shared' window by Google Maps and 'Embed a Map' circled in red.
    4. Select 'Copy HTML' to copy the embed code to your clipboard. Note: The embed size in Google Maps has no impact on your embed row — this setting can be ignored.
      A web browser screenshot shows the 'Embed a Map' window with 'Copy HTML' circled in red.
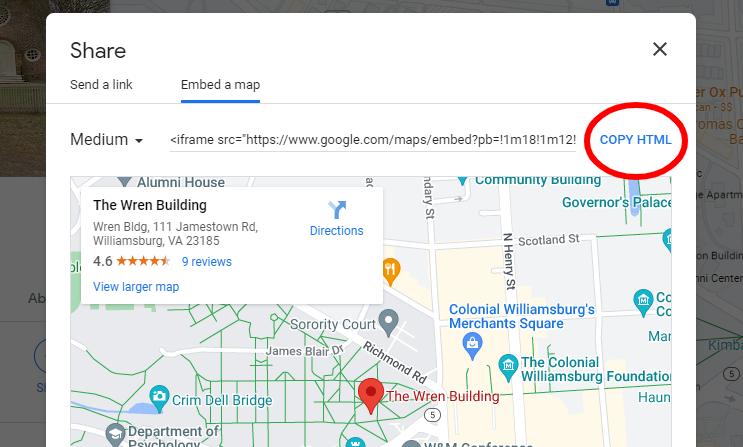
    5. Paste the HTML code from your clipboard into the Embed Code field in Cascade.
Embed Layouts

Choose one of the available layout options - Feature, Wide Feature, 50-50, 50-50 Large or Edge-to-Edge. You can edit the row at any time to switch to a different layout.

Single column table of collapsible items for formatting purposes.
Feature & Wide Feature

Presents the optional title and intro text above a large (Feature) or larger (Wide Feature) Google Map embed, with an optional link below. All elements are centered within the row. 

  • Intro Text: Option to add simple text below the title and above the embed. Text appears center justified and can include links, bold and italics.
  • Link Text: Option to include a link below the embed. Tip: the Google Map embed provides visitors a link to view the map on Google or get directions, so it is not necessary to use this field for that purpose.
  • Internal Link: Use to link the text to an available Cascade asset.
  • External Link: Use to link the text to an asset not available within your Cascade Site.
  • Anchor: Use to specify an anchor for your internal or external link — no # symbol required. To link to an anchor on the same page as the row, do not specify an internal or external link destination. New to anchors? Learn how to first create an anchor on your pages or rows.
50-50 & 50-50 Large

Two side-by-side content areas of equal size — one presenting the Google Map embed as an inset map (50-50) or as a large edge-to-edge element (50-50 Large), the other a title, text and linked button. 

  • Order of Elements: Applies only to the desktop view of the row; choose Embed Left or Embed Right; the text will appear on the opposite side of the row. The elements will always stack vertically on small devices with the embed above the text.
  • Text Side:
    • Text: Required field; enter text that appears below the title (if displayed) and above the optional button. 
    • Button:
      • Button Text: Provide the text to appear on the button. Tip: The length of the text determines the size of the button — keep it short for an optimal appearance across devices.
      • Internal Link: Use to link the button to an available Cascade asset.
      • External Link: Use to link the button to an asset not available within Cascade.
      • Anchor: Use to specify an anchor for your internal or external link — no # symbol required. To link to an anchor located on the same page as the row, do not specify an internal or external link destination. New to anchors? Learn how to first create an anchor on your pages or rows.
Edge-to-Edge

A large format presentation that extends the full width of the browser window for a Google Map embed with no title, text or additional links displayed. The Row Theme setting does not impact the appearance of this layout.

Tip: If you need to include more than one Google Map row on a page, do not select embed layouts where edge-to-edge map content will be adjacent to other edge-to-edge map content.

Updating Row Content
  • To update the content of a row, edit and publish the row file. 
  • You do not need to publish the pages displaying the row.
  • If a row is unpublished or deleted, it will no longer appear on any live pages.
Tip: If you move or rename a row file, you must publish any pages displaying the row. Not sure which pages are using the row? Check for relationships to the row.
Example Google Map Rows

Below, we offer sample rows to demonstrate suggested uses and best practices.

Visit the Keck Lab

Located on the shore of Lake Matoaka on the William & Mary campus in Williamsburg, Virginia, the Keck Enviornmental Field Laboratory provides instructional and research support for environmental programs at William & Mary and at the Virginia Institute of Marine Science.

More about the Keck Lab

Your Campus in the City

Started in 2001, the William & Mary Washington Center partners with faculty from departments and schools across the university to offer high-impact learning experiences for students in all majors. Among the diverse topics offered are government, policy, culture, business, education and more.

Study in D.C.

Join Us for a Wren Ten

Join the Gents for our semesterly pop-up concert at the Wren Building! This semester we will have a Halloween-themed performance, so feel free to show up in costume. As always, our Wren 10 will take place at the Wren Building portico at 10:00 p.m. on the Wednesday before Halloween — October 25.

Cascade Basic Training

Register and attend an upcoming basic training session. No need to bring a laptop as our training room in Jones Hall will have an available computer for each registrant to use.

Swem Library

Study in D.C.