Photosets
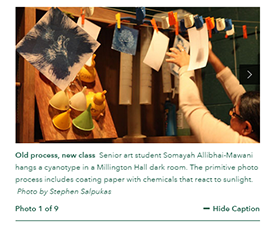
Groups of scrollable images on news stories and features
 Photoset images should be 475 x 265 pixels. If a photo is vertically oriented, the height should be 265 pixels, and you must mat the photo to make it 475 pixels wide (that is, place the image on a background color that is 475 pixels wide). The suggested mat color is black.
Only use text-free graphics and photos to communicate in images unless it is a logo or similar brand mark that is not trying to convey content. This ensures that the text can be resized, read by screen readers, and adapted to different user needs. For more on our specific guidelines, review the Web Accessibility help page.
(If you do not have photo editing software, try one of these image editors.)
Creating a photoset
Step 1: Create a photoset folder
- Navigate to the folder where you store your photosets.
- From the top menu, choose Add Content >> Folder with Photoset
- Enter a Folder Name (all lowercase, no spaces), Display Name, and click Submit (if prompted, correct spelling errors and click Next to proceed.
Step 2. Upload images and add your titles and captions
- Crop and save images to 475 x 265 pixels on your computer. We recommend .webp or .jpg for all photos and graphics without transparency. For graphics with transparency, we recommend .webp or .png. To simplify your upload process, save your image with a name using no spaces that is all lowercase.
- In the same folder you just created, upload the images.
- Edit the photoset file and use the image chooser to add photos to the collection. Enter a title, caption, and (optional) photo credit for the selected image. Click the + symbol to add new photos to the photoset. Use the up/down arrows or drag-and-drop to reorder your collection.
Step 3: Add the photoset to a news story or feature page
- Edit the news story or feature page.
- Under the Photoset section, click Choose Page and choose the photoset file you just created.
- To save, select Preview Draft and then Submit >> Check Content & Submit.
Legacy building method
The legacy method of adding photoset titles and captions directly to the image files is still operational for old photosets; however, for accessibility compliance purposes, photosets should no longer be built that way. The Display Name field on your image files should be reserved for providing descriptive alt text.
Fancy captions
Our unique tags help you apply basic text formatting to your captions. Surround your text with {em} and {/em} for italics or {strong} and {/strong} for bold. To add a line break, type {br}. To add a text link, use the hyperlinking in text fields method.
Troubleshooting
My photoset is not scrolling through my images.
- Your Photoset Title and Caption fields should not have any line breaks/carriage returns/hard returns (these can get copied in when copying from external sources such as Word).
- One or more of your photoset images may not be one of the recommended file types (.jpg, .png, .webp). Double-check that files do not have an uppercase JPG extension (file extensions are case-sensitive).
My story/feature is live, but my photoset does not appear.
Ensure you publish both the story/feature page and the photoset folder.
The top banner image repeats on the page in an endless loop.
Edit your story or feature and ensure that you selected a photoset file in the Photoset field, not the current page.
The photo(s) in the photoset is missing or have vertical and horizontal scrollbars on the published website, as if my photos are too big.
Edit your photoset file. On the Configure tab, make sure the "Maintain Absolute Links When Publishing" checkbox is checked. Re-publish the photoset file.
My photoset looks like a solid color box in Cascade.
Photosets are separate pages combined with a story/feature on the live web server, not in Cascade. Think of the box as a photoset placeholder. Click the preview link provided in the box to view the photoset. Publish the photoset folder and the story or feature to view them on your live website.
 Skip to main content
