


Insert Images
For a more detailed how-to for images and multimedia (including video), visit the content images and multimedia sections.
 Insert/edit image
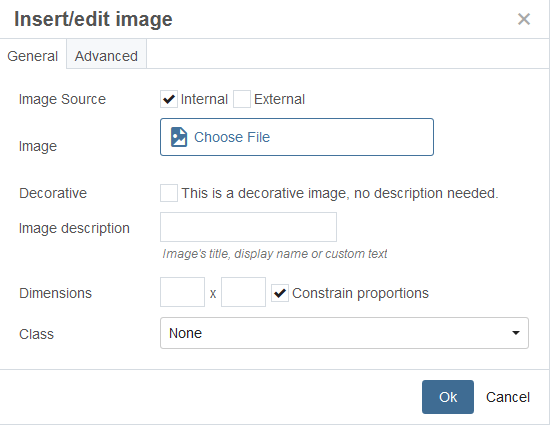
Place your cursor where you would like to place an image. After clicking the Insert/edit link button, a dialog box will open:
- Select an image source of Internal or External. We recommend you only insert internal images (those you have uploaded to Cascade). Those hosted externally may not be reliable.
- Click the Choose File button to browse or search for the desired image in Cascade. Choose.
- Fill in the Image description field with text describing the image. In addition to improving usability for visually impaired users this text is also used as the caption for the photo if an appropriate format is applied.
- To adjust an image already in your content, select the image and click the Insert/edit image button () to bring up the dialog box.
Image dimensions
If you need to reduce the size of the image visible on the page, fill in a width or height limit, leaving the box checked to maintain proportions. Note: always upload images to Cascade that are approximately the size you will want them to display on the page - never upload full-size files.
Apply a format
You can use the Class field to apply the photo-left, photo-right, photo-left-with-caption, photo-right-with-caption formats to the photo. These will align the image to the left or right, letting the adjacent content on the page wrap around the image. If you do not wish for the adjacent content to wrap, you can choose photo-center, photo-center-with-caption or photo-with-caption to either center the photo or have it left aligned (as it is by default) with no text wrapping. These formats can also be applied to the image using the Formats sub-menu later.
