


Banner 9 Class List
Banner Self-Service allows you to view your class rosters, provide registration overrides, grade and view advisee information, as well as email your class.
Get started
- Go to myW&M, click the Banner button and log in with your W&M Username and password
- From the Faculty Services Menu select Banner 9 Class List
- A general navigation PDF is available as a quick view for features with more detailed steps listed below
Filter for and Select Your Course
- Banner 9 CRN Listing defaults to show all terms. There are two ways to filter the CRN list by term to more easily find your course:
- Use the Term drop-down menu on the left side to select the term and filter the list of CRNs
- Type the term in the Search box on the right side of the page to filter the list of CRNs
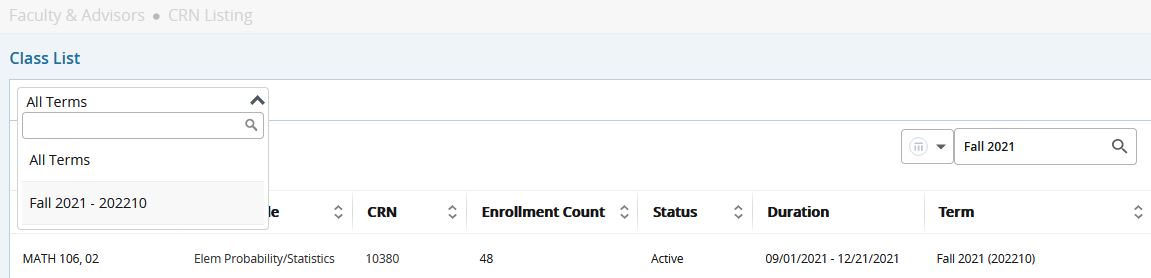
- The CRN Listing table view provides basic information like course title, CRN, and current enrollment count. Use your cursor to select the course from the filtered list. The class list for the course will display on the next page
- Click the course title on the CRN listing table view to present a pop-up box with course details like the course description, course pre- and corequisites, and course attributes
- Note: only courses with enrollment will display in your class list. If there are no students registered in the course yet, the course will not display
View Your Class List
- The Class List page is divided into two sections. Course Information (like title, CRN, and enrollment counts) will display at the top of the page. The roster will display below the course information section
- Use your cursor to hover over a student's name. A contact card with information like program and email address will display
- Search for a specific student on the roster by using the Search box on the right side
- Student information can be displayed in Summary View or Detail View. Use the drop-down menu on the right side to switch between the views
- Hide columns by using the column drop-down on the right side and unchecking the fields you do not want to display
- Note: only courses with enrollment will display in your class list. If there are no students registered in the course yet, the course will not display
- To easily switch between CRNs, use the drop-down menu above the Course Information section to select another CRN.
Export Your Roster to Excel
Use the "Export" function in the top right corner to export a class list to Excel. Click the "Export" link, select your export file type (.xls or .xlsx), then click Export. Please note that the listed "Class" column on the excel export may not be the student's correct social class.
Emailing Your Class
Banner 9 Class List has a built-in email function. Select the students you wish to email by clicking the check box next to their name(s) on the left side of the roster. Once you have selected one or more students, use your cursor to click the email envelope icon on the right side. A new email will open through your Outlook client with the student email addresses auto-populated in the BCC line.
- Want to install an Outlook email client on your computer? Contact the Technology Support Center at [[w|support]] or (757) 221-HELP.
- Want to email your class without installing an email client on your computer? You can do so through settings in the Google Chrome browser. W&M IT has instructions available in the FAQs section of the Office 365 Email page.
Class Missing from the List?
If you expect to see a course in the list but do not, keep in mind that only courses with enrollment display in the class list. Once one student has registered for the course, it will display for you to see the roster.
Need help?
If you have additional questions or need assistance, please contact the Office of the University Registrar at (757) 221-2800, or contact IT Support at (757) 221-HELP.
