


Formatting
Formats Sub-Menu
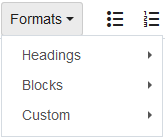
The Headings, Blocks and Custom formats that can be applied to your content are available in the Formats sub-menu - found in the second row of editor features and within the Format menu.
When applying formats, you may find it helpful to turn on the View >> Show blocks feature. This provides guidelines around the various elements within your content.
 Headings
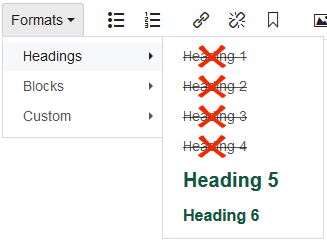
You will see all heading sizes used by Cascade websites listed, however only Heading 5 and Heading 6 are available for use in the content area of your page. (Headings 1-4 are reserved for other elements such as page titles, teasers and widget headings.)
For more on the appropriate use of headings, see How To Arrange Your Content.
 Blocks
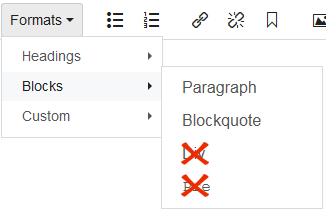
Under the Blocks sub-menu you will find the Paragraph and Blockquote formats to apply to your text. The Paragraph format is the standard text size you use in the body of your page.
You will find the paragraph format applied to your text for you automatically when you hit Enter/Return on your keyboard at the end of your first paragraph.
 Custom
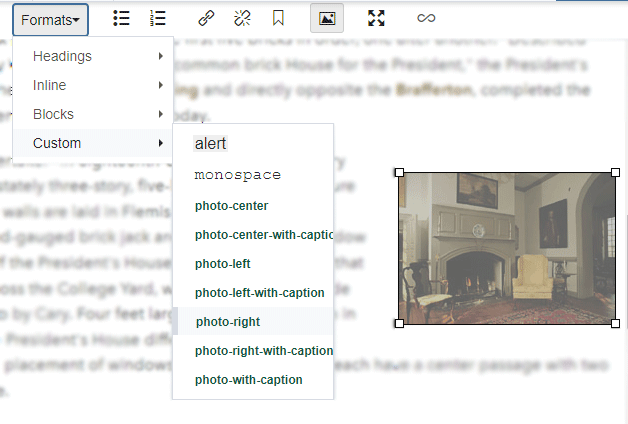
In the Custom sub-menu you will find a variety of formats you can use on appropriate content elements — images (photo-left-with-caption, photo-right-with-caption, photo-left, photo-right, photo-with-caption, photo-center, and photo-center-with-caption), tables (table-cell-center-align, table-special, table-special-left, etc.), collapsible lists (table-collapsible), button text (content-button), must-see alert text (alert), emergency communications (emergency, visible to approved offices only) and external links (external-link, this is an historic format that is no longer needed).
To discuss the best use of these options within your area, department or school, contact your Cascade Manager.
How to apply or change a format
To apply a format, select your element (image, table or text) and use the Formats sub-menu to apply the desired effect. To select an image, click on it; to select a table, place your cursor within the table and click "table" in the path display at the bottom of the editor; to select text, simply highlight it using your cursor. Note, for convenience, you will only see applicable formats in the Format >> Custom sub-menu for the type of content you have selected.
For images and links, you can also change the format applied using the Class dropdown on the Insert/edit image and Insert/edit link dialog boxes.
To change or remove a selected format, select the element and select Format >> Clear formatting (![]() ).
).
Troubleshooting
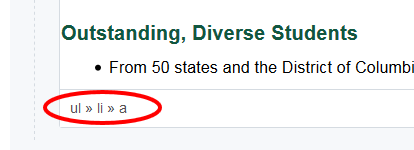
If your edits appear different than expected after applying a format, it's possible it was applied to the wrong element (a leftwithcaption applied to paragraph text instead of the image, etc.). To confirm what formats are currently applied to an element, click on or inside that element and look for the path at the bottom of the window. You may also find it helpful to turn on the View >> View blocks feature. This provides guidelines around the various elements within your content.
