


Feature Page
Similar to a News Story page, but more timeless.
Feature Page vs. News Story Page
Feature Pages look a lot like news stories, only they have NO by-line or date-line, making them more timeless in nature. Your listing page of features will be sorted in folder order, which means the site webmaster can choose the order in which they appear.
New to Working with Features?
- If your site does not yet use Features, you will first need to create a Feature Listing.
- See an example of a feature page and an example of a feature listing page.
- You can borrow features from other folders across your school's Site into your features folder. Learn how to work with Borrowed Feature pages.
Create a New Feature Page
Step 1: Prepare Your Images
- You will need to prepare and upload a square thumbnail image which will display on your listing page.
- (optional) Add a photoset to your feature. You can build your photoset before you begin, or create one and add it later. See an example and learn how to build your photoset.
- (optional) Prepare and upload a Social Media Thumbnail image.
Step 2: Build the Feature Page
- Navigate to and select your features folder.
- From the top menu, choose Add Content >> Feature Page.
- Complete the Title, Summary and Teaser fields.
- Set the right column, parent and sibling checkboxes. These adjust the right column and left menu on this page only.
- Enter the content of your feature in the WYSIWYG editor.
- Do not copy and paste directly from another source (Word, email, webpage). First copy from the source, then in the Cascade editor click Edit >> Paste as Text before you paste. You can also clean up your text by first pasting it into a text editor such as Textpad or Notepad.
- In the Thumbnail Images section, for the Square Thumbnail select Choose File to select the image you prepared and uploaded during Step 1.
- Save & Preview. Then Submit >> Check Content & Submit. (If prompted, correct spelling and click Next.)
- Publish your features folder.
Step 3. (optional) Add Media Links
-
Prepare your media (build your gallery or upload your document).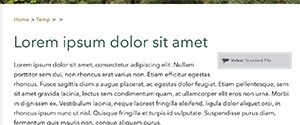
- Edit the page.
- Scroll down to find the Other Media >> Media section.
- Use the dropdown to select the 'Media Type'.
- Click either Choose File or Choose Page to browse to and select the media to be linked.
- Save & Preview. Then Submit >> Check Content & Submit. (If prompted, correct spelling and click Next.)
- Publish your features folder.
Step 4: (optional) Additional Elements for Your Feature
- Use the Photoset section to add a photoset to the top of your page.
- Add Related Links or other features to the right column to direct readers to other items of interest.
- Embed a YouTube video within the content area, or create a YouTube widget to place in the right-hand column.
Resolving Potential Problems
My page has a weird shaded rectangle just under my feature title...
 It sounds like you have selected a 'Media Type' from the Other Media area dropdown, but have not selected the media to be referenced. You can either:
- change the dropdown to 'None', and the shaded box will go away, or
- use Choose File or Choose Page under the dropdown to select the media to be linked; this will add the proper media icon and link within the shaded box.
